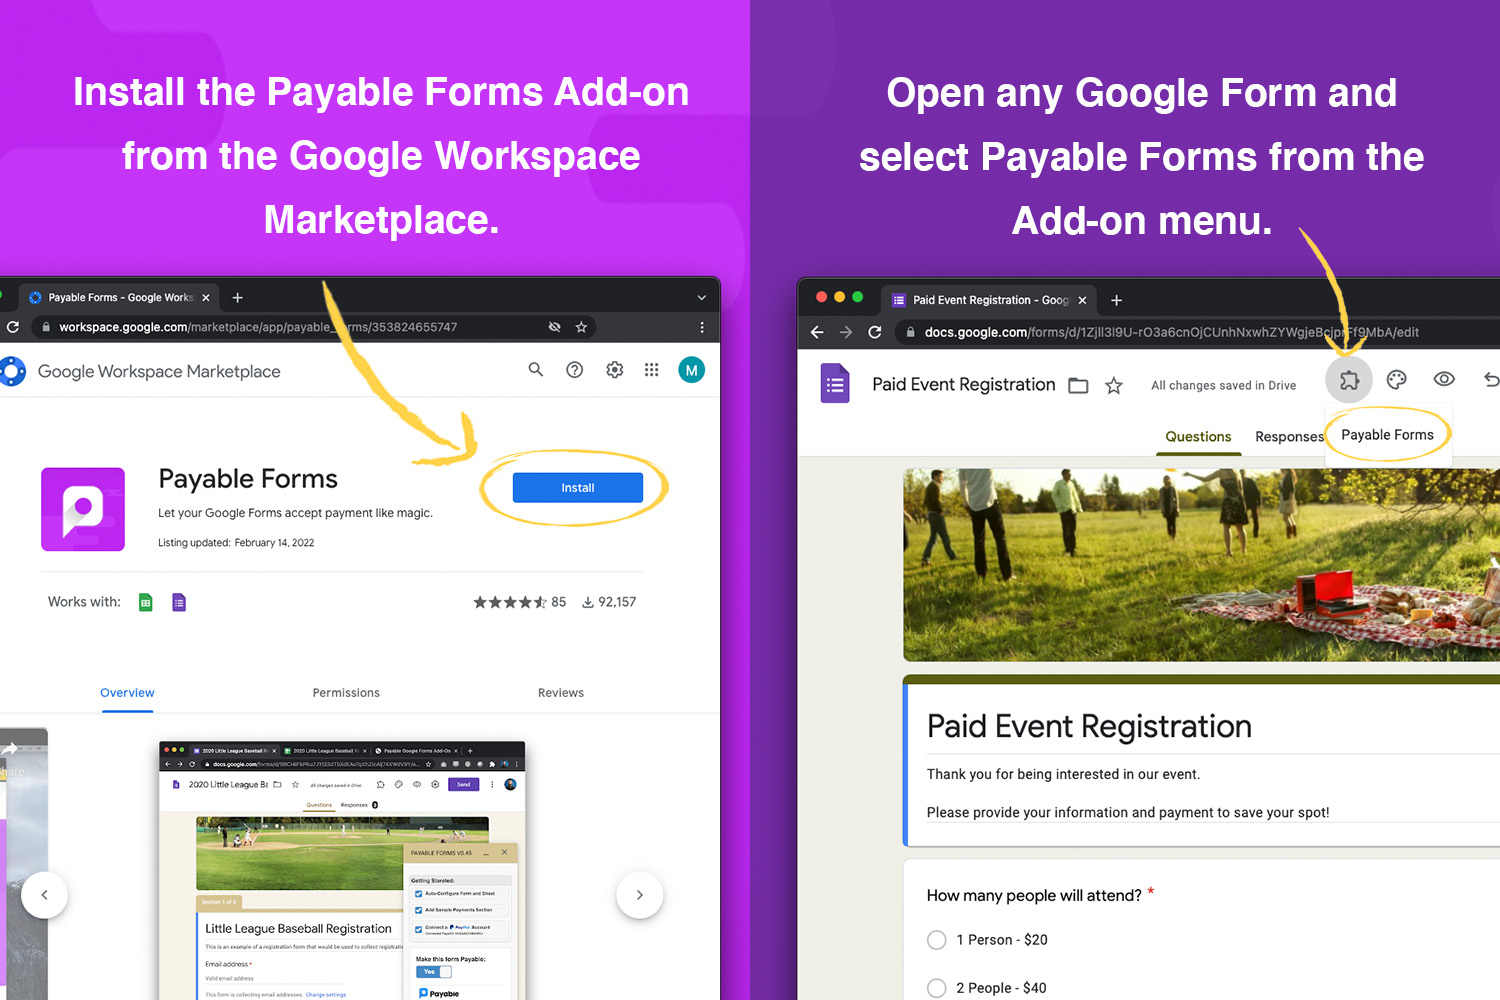
4 easy steps

How to accept payment in a Google Form.

Google Forms are a powerful, versatile way to collect information online, and they're quick to set up for almost anything. In this guide we'll show you how to make a Google Form accept payment.

  1. 1Install the Payable Forms add-on
  2. 2Connect a payment provider
  3. 3Try it in Test Mode
  4. 4Track payments in Google Sheets
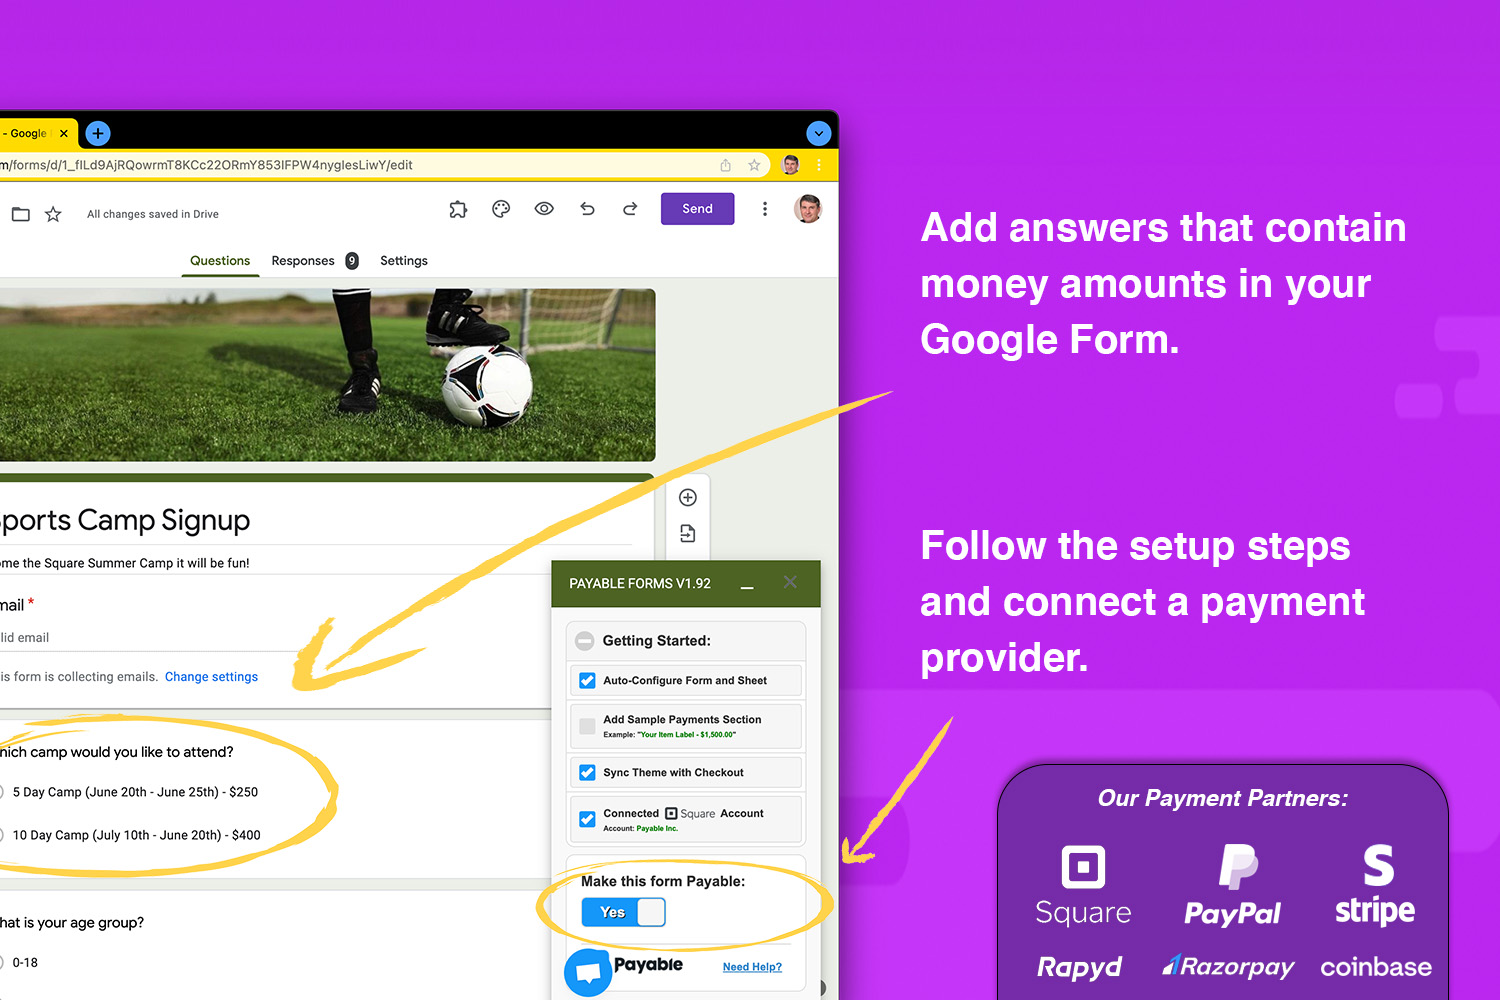
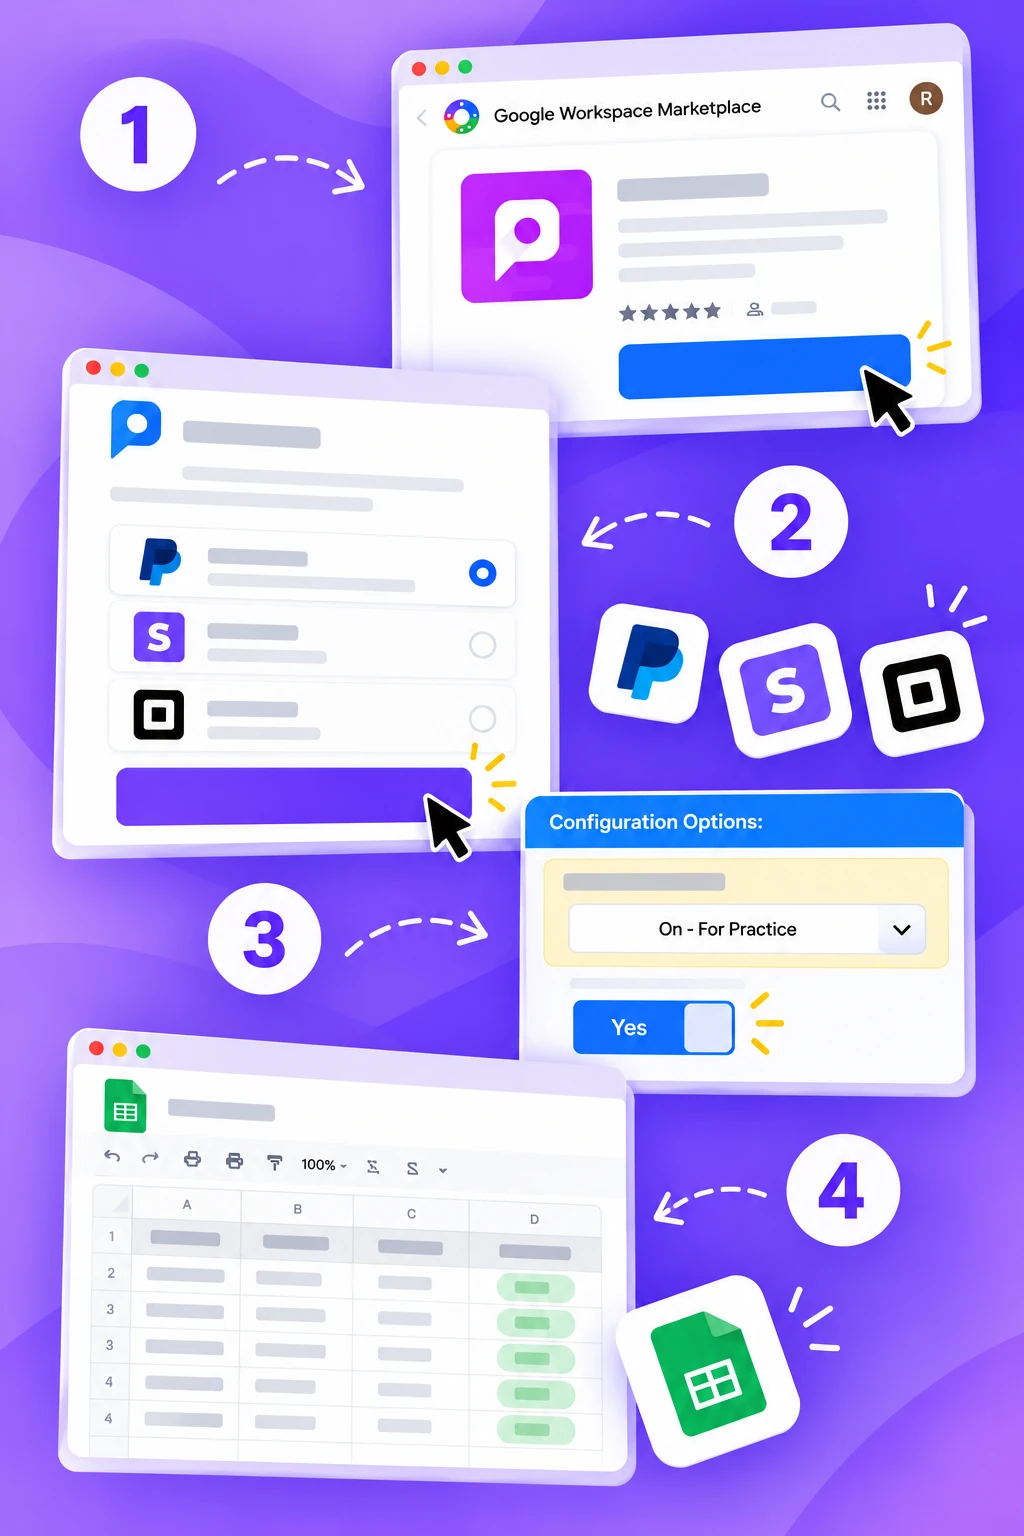
Illustration of the 4 steps: installing Payable Forms from the Google Workspace Marketplace, choosing PayPal, Stripe or Square, switching on Test Mode and making the form payable, and tracking paid entries in Google Sheets.
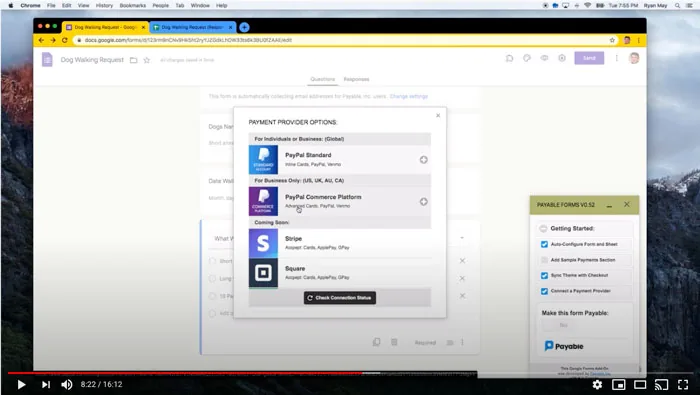
Connecting a payment provider to a Google Form: PayPal, Stripe, Square, Rapyd or Razorpay

Step 2

Connect a payment provider

The Payable Forms add-on automatically finds the money amounts in the answers your users select and calculates the order total.

Connect one of the supported payment providers:

  • Connect PayPal to Google Forms
  • Connect Stripe to Google Forms
  • Connect Square to Google Forms
  • Connect Razorpay to Google Forms
  • Connect Rapyd to Google Forms

Complete the connection flow, then toggle "Make this form payable" to Yes.

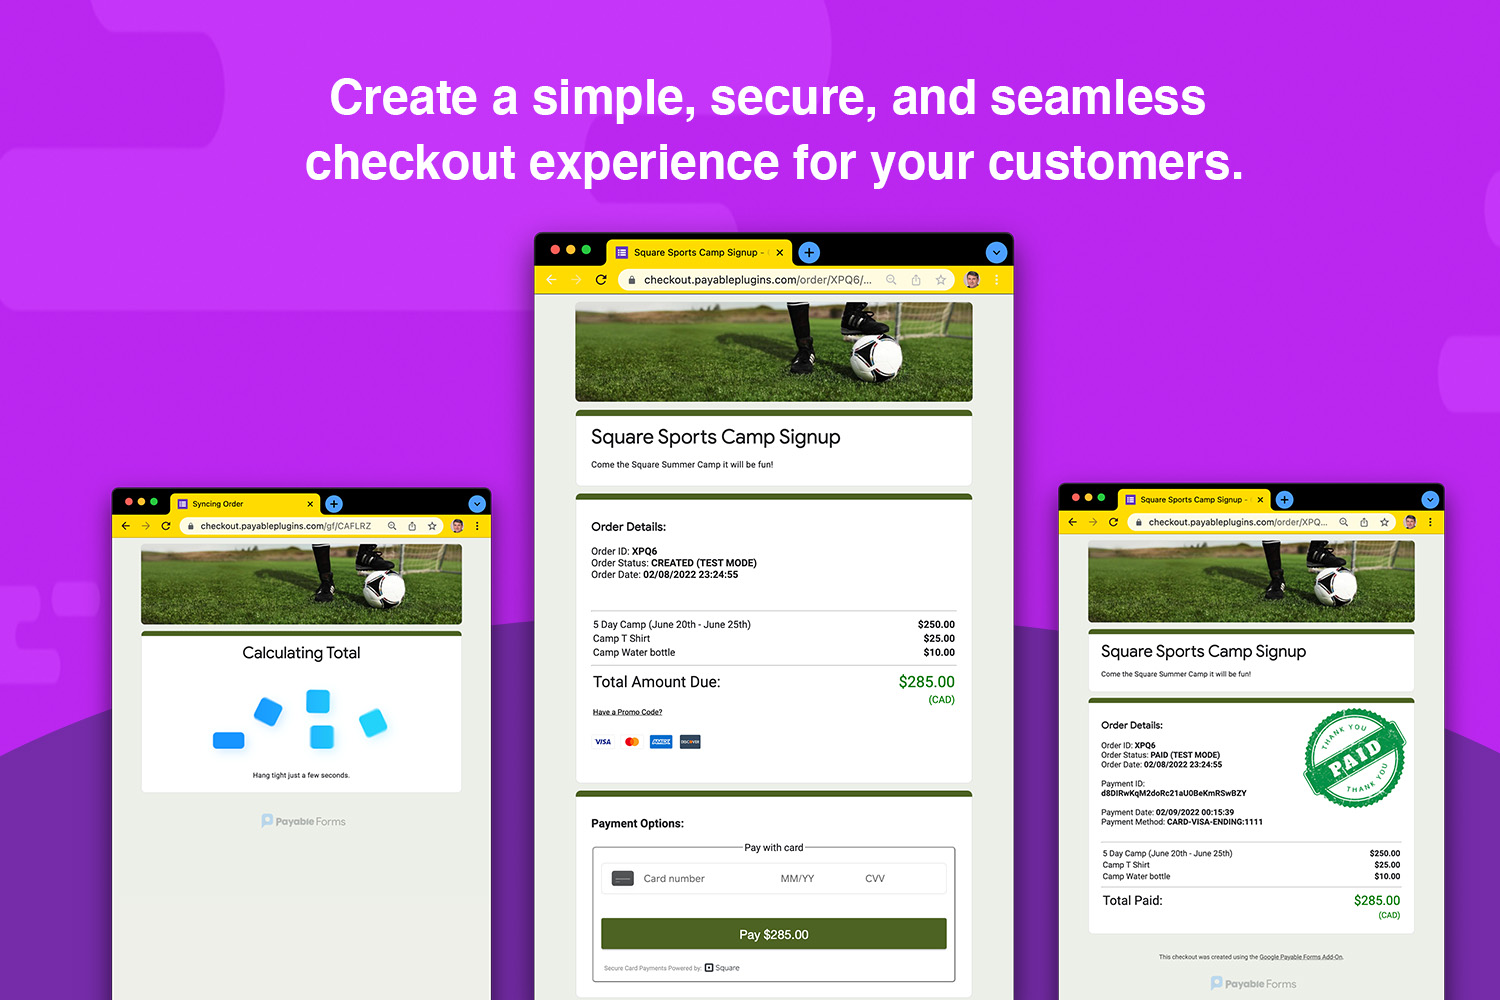
Checkout with payment order form and credit cards for a Google Form

Step 3

Try it in Test Mode

Grab your form's public link and fill it out yourself — you'll land on Payable's secure checkout with your total already calculated.

Payable starts in "Test Mode", so you can practise and make sure your form is calculating correctly before you send it out.

When you are ready, switch Test Mode to "Off - Real Money" and that's it — you're ready to collect money in your Google Form.

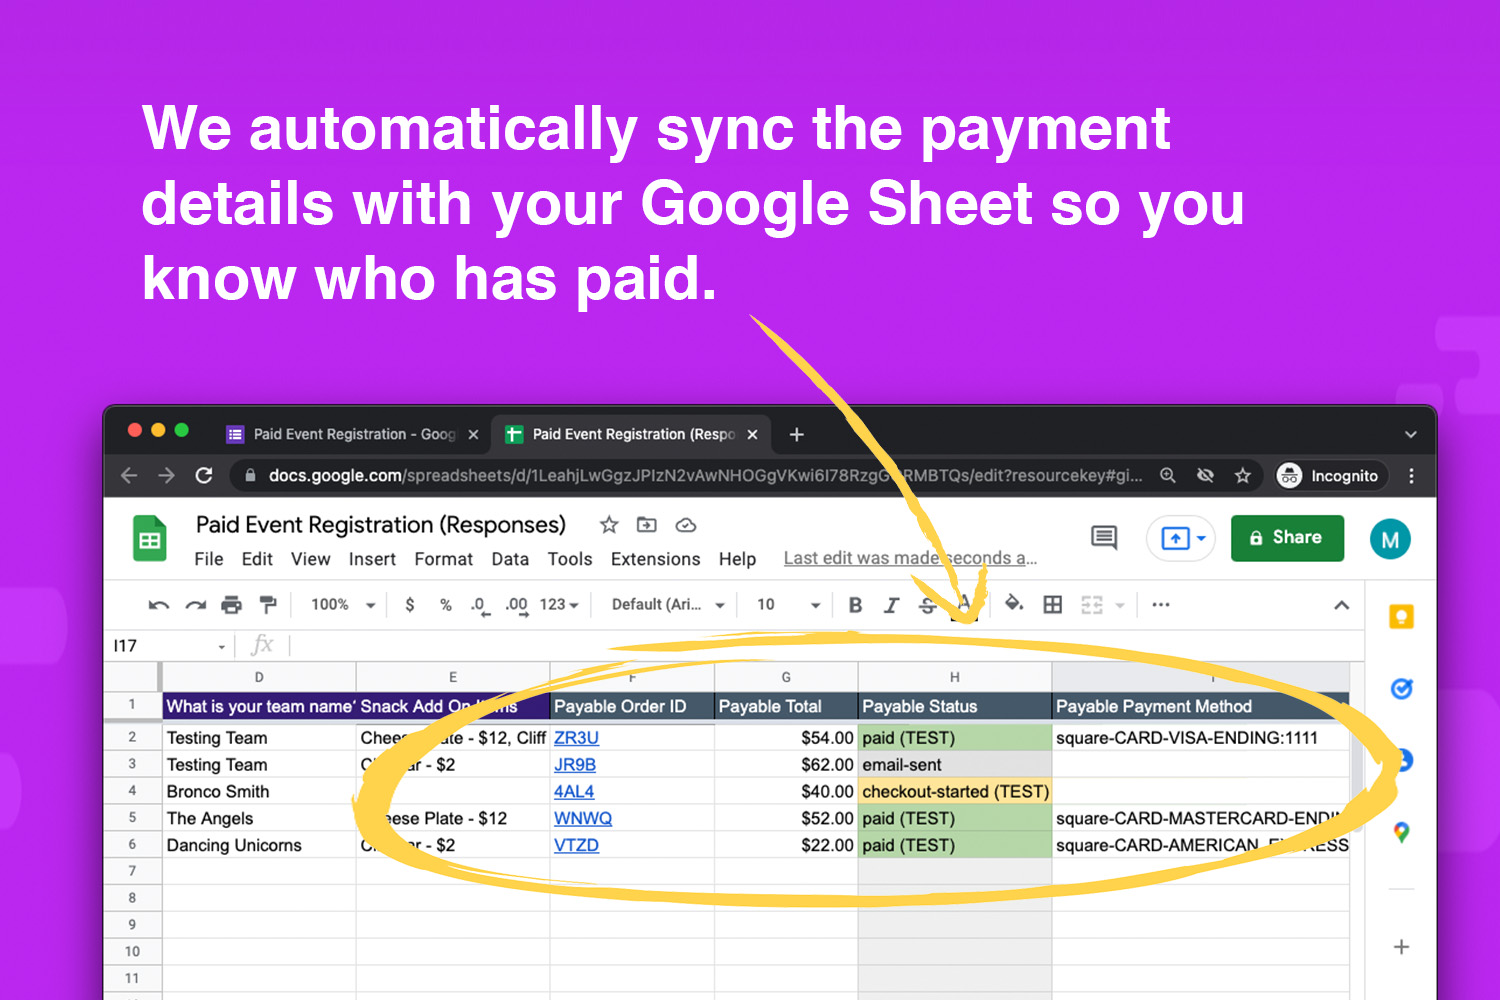
Payment tracking in a Google Sheet from the Google Form data

Step 4

Track payments in Google Sheets

After each submission, all the data flows to your linked Google Sheet. Open it and you will see Payable has added new columns to track the status of each submission.

When someone pays, their Payable Status updates to "Paid".

Payable can automatically send reminders after 24 hours to anyone who hasn't paid yet, and you can manually mark orders as paid if they paid another way.

Try it yourself

Submit a sample form in Test Mode.

These are real Payable Google Forms running in Test Mode. Fill one out to see exactly what your customers will experience — no real money changes hands.

Browse all templates →

Prefer to watch?

Payable Forms detailed overview

Follow along as we set up a payable Google Form from start to finish — installing the add-on, adding prices, connecting a payment provider, testing checkout and tracking payments in Google Sheets.

Find more walkthroughs on our YouTube channel.

Try the Payable Forms add-on.

No sign-up required. Set up in about 5 minutes.